5120x1440p 329 portal 2 images are known for their incredible detail and clarity. They’re perfect for use in high-resolution displays, such as 5120x1440p monitors. So what are they and how can you get them? In this blog post, we’ll explore everything you need to know about 329 Portal 2 images, including how to find and download them. We’ll also provide tips on using them for your own projects. So jump on board and learn everything you need to know about 329 Portal 2 images!
What are the benefits of using 5120x1440p 329 portal 2 images?
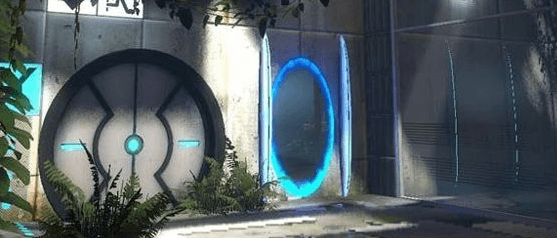
5120x1440p 329 portal 2 images make your game look better. This is a simple, yet profound statement that can have a dramatic impact on the overall quality of your game.
If you’re like most developers, you use images to make your games look better. But how do you know which image formats are the right ones? You could spend hours trying to find the answer, but at least with this article, we can save you some time. Here we’ll take a look at the benefits of each format, and what they can do for your game.
Portal 2 IMAGES come in several different formats: BMP, JPG, PNG, TGA, and FLA. The most popular format is JPG because it’s versatile and easy to use. It supports all common graphics editing programs, and most browsers display it without any problems. However, it doesn’t have as many features as PNG or TGA.
BMP is a bit more limited than JPG; it only supports 8-bit images and doesn’t support transparency or grayscale images. PNG is similar to JPG in many ways; it also supports transparency and grayscale images but has additional features such as alpha channels (which allow you to create transparent icons), large files (up to 4GB), and support for international characters.
TGA is the best choice if you want high-quality images without spending a lot of money. It supports 16-bit color depth
How to create 5120x1440p 329 portal 2 images in Photoshop?
Assuming you have a standard Photoshop document with dimensions of 5120×1440 pixels, the following instructions will create 329 images at that resolution. If your document is not within those dimensions, or if you need to create additional images, adjust the number accordingly.
To begin, open your Photoshop document and set the size to 5120×1440 pixels. This will ensure that all the images created will be of this particular size.
Next, using the Rectangular Marquee tool (M), select an area of your document that will act as a border for your image. In this example, I’ll use the bottom-left corner of my document as my starting point and use the word “BORDER” in the Selection Options bar to denote my selection.
With your border still selected, press and hold down the Shift key and click inside the border to add a new layer. Now let’s start creating our actual images! To do so, we’ll need to use one of Photoshop’s most powerful tools – the Layers panel. Click on the Layers panel button in the toolbar and then drag it up so that it lines up above your other panels.
To begin working on our first image, simply delete all of Layer 1’s contents by selecting
What are the steps for creating a 329 Portal 2 images?
Creating 329 Portal 2 images is simple if you have the right tools. The first step is to create a new image file. To do this, open your favorite photo editing software and create a new blank document. You’ll want to keep the dimensions of your new image at 1024×768 pixels, as that’s the native resolution of Portal 2. Next, use the save as feature to save your image file in the .jpg format.
Once you’ve saved your image file, it’s time to begin importing your images into Valve’s game engine. Open up Steam and click on the Games menu option. From here, select Portal 2 from the list of games on your computer. This will take you to the main game window. Next, click on the Play button in the lower left-hand corner of this window and then select New Game from the drop-down menu that appears. In the next window that pops up, make sure you have selected Desktop Mode (located in the bottom-left corner) and then select Portals from the drop-down box located next to Mode. This will open up a selection box for all of your imported images—choose all of them by clicking on Select All or pressing Ctrl+A on your keyboard!
Once you’ve imported all of your images into Portal 2, it’s time to start creating levels! Click on one of your imported images in order to bring up its properties box (it should look something like
Conclusion
Here at TFG, we love Portal 2. And if you’re a fan of the game, then chances are you’re curious about all the beautiful images that Valve put together for it. In this article, we’ve collected everything you need to know in order to get up close and personal with 329 of those images. From high-resolution screenshots to detailed breakdowns of each image, we hope that this article has given you enough information to explore all the beauty that Portal 2 has to offer. So go ahead, open those doors…and let your imagination run wild!