Roof damage is a common issue homeowners face, particularly after severe weather events. Identifying and addressing roof damage promptly is crucial to prevent further deterioration and costly repairs. We will explore a comprehensive, step-by-step guide to assessing residential roof damage. We will help you understand the signs of roof damage, the tools needed for inspection, and the steps to take for a thorough evaluation. Whether you are dealing with an older roof or recent storm damage, we will provide the essential steps to ensure your roof remains in optimal condition.
Understanding the Signs of Roof Damage
The first step in assessing roof damage is understanding the signs indicating potential issues. Roof damage can manifest in multiple forms, including missing shingles, cracked or curled shingles, and granule loss. Additionally, water stains on ceilings and walls inside the home can indicate leaks from roof damage. It’s essential to be aware of these signs to identify problems early. During an initial visual inspection from the ground, look for shingles that are not lying flat or any that are missing entirely. Additionally, check for any visible sagging or uneven areas on the roofline, as these can be signs of structural issues. Pay close attention to the roof’s flashing, particularly around chimneys, vents, and skylights, as damaged flashing can lead to leaks.
Preparing for a Roof Inspection
Before conducting a detailed roof inspection, gather the necessary tools and safety equipment. A sturdy ladder, a pair of binoculars, a flashlight, and chalk or a marker for noting damage are essential. Wearing appropriate clothing and non-slip shoes is crucial for safety. If the roof is steep or you are uncomfortable with heights, conducting as much of the inspection as possible from the ground or using binoculars for a closer look is advisable. For those comfortable climbing onto the roof, always ensure the ladder is securely placed and follows all safety guidelines. Clear debris, such as leaves and branches, from the roof to get an unobstructed view of potential damage. Having a checklist can be helpful to ensure all areas are noticed during the inspection process.
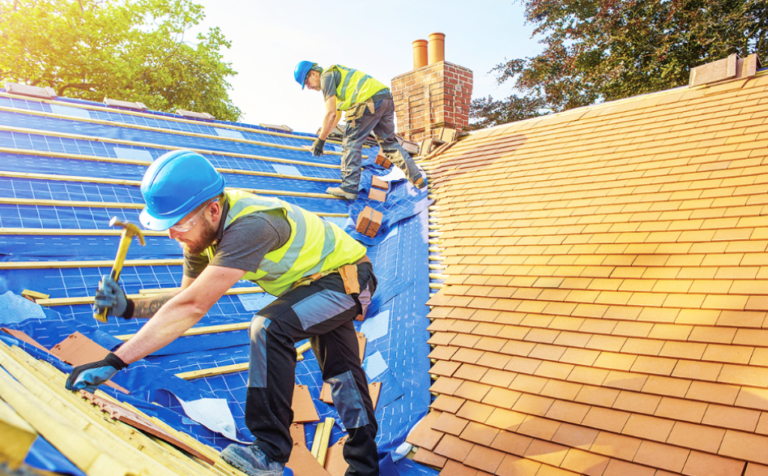
Conducting a Thorough Roof Inspection
Begin the inspection by examining the exterior of the roof. Start at the lowest point and work up to ensure a systematic evaluation. Look for signs of wear and tear, such as missing, cracked, or curling shingles, and note any areas where granules appear to be eroding. Check the condition of the flashing around roof penetrations, as damaged flashing is a common cause of leaks. Use a flashlight to inspect the gutters for granules and other debris that could indicate shingle deterioration. Inspect the roof valleys, where two roof planes meet, as they are particularly vulnerable to damage. Additionally, check for any signs of mold, moss, or algae growth, as these can compromise the roof’s integrity.
Read also: Shielding Your Home: The Crucial Role of Routine Roof Care
Inspecting the Attic and Interior
After completing the exterior inspection, move inside to check the attic and interior for signs of roof damage. The attic is an excellent place to identify leaks and moisture problems that may not be visible outside. Look for water stains, mold, or mildew on the attic’s insulation, beams, and walls. Any musty odors can also indicate a moisture issue. Use a flashlight to check for holes or gaps in the roof decking, which can allow water to seep through. Additionally, inspect the ceiling and walls of the rooms directly below the roof for any water stains or peeling paint. These signs often indicate that water penetrates the roof and damages the home’s interior.
Documenting and Reporting Roof Damage
Once the inspection is complete, document all findings with photographs and detailed notes. This documentation is crucial for filing insurance claims or for contractors who will perform repairs. Be thorough in your notes, describing the location and extent of the damage. Photos should capture wide shots of the roof’s overall condition and close-ups of specific problem areas. Organize the documentation systematically, separating exterior and interior findings for clarity. If you are filing an insurance claim, contact your insurance company as soon as possible to report the damage. Provide them with your documentation and be prepared to answer questions about the inspection. Early communication with the insurance company can expedite the claims process and ensure you receive the necessary repair assistance.
Deciding on Repair or Replacement
Based on the damage’s severity and the roof’s age, decide whether repair or replacement is the best course of action. Minor damage, such as missing shingles or small leaks, can often be repaired without replacing the entire roof. However, extensive damage, particularly on an older roof, may require a complete replacement. Consider the long-term costs and benefits of each option. Repairing minor issues can extend the life of your roof, but if the roof is nearing the end of its lifespan, replacement might be more cost-effective in the long run. Consult with 1 Source Roofing and Construction near Atlanta to get an expert opinion and estimate for the necessary work.
Assessing residential roof damage is critical for maintaining your home’s safety and integrity. By understanding the signs of roof damage, preparing for a thorough inspection, and documenting findings, you can effectively identify and address issues before they escalate. Whether deciding on repairs or a complete replacement, timely action will help protect your home and investment. Regular roof inspections, especially after severe weather, can prevent minor issues from becoming major problems. You can ensure your roof remains in good condition, providing protection and peace of mind for years.